Progress towards hardware v1.5
This project has been going on in some form since the summer of 2019, and I’m now finally getting around to blogging about it. My goal here is to keep some kind of a history of issues encountered and overcome, as well as technology choices (and how that choice panned out!)
My main has recently been finalizing hardware v1.5 and an enclosure (latest rendering below)
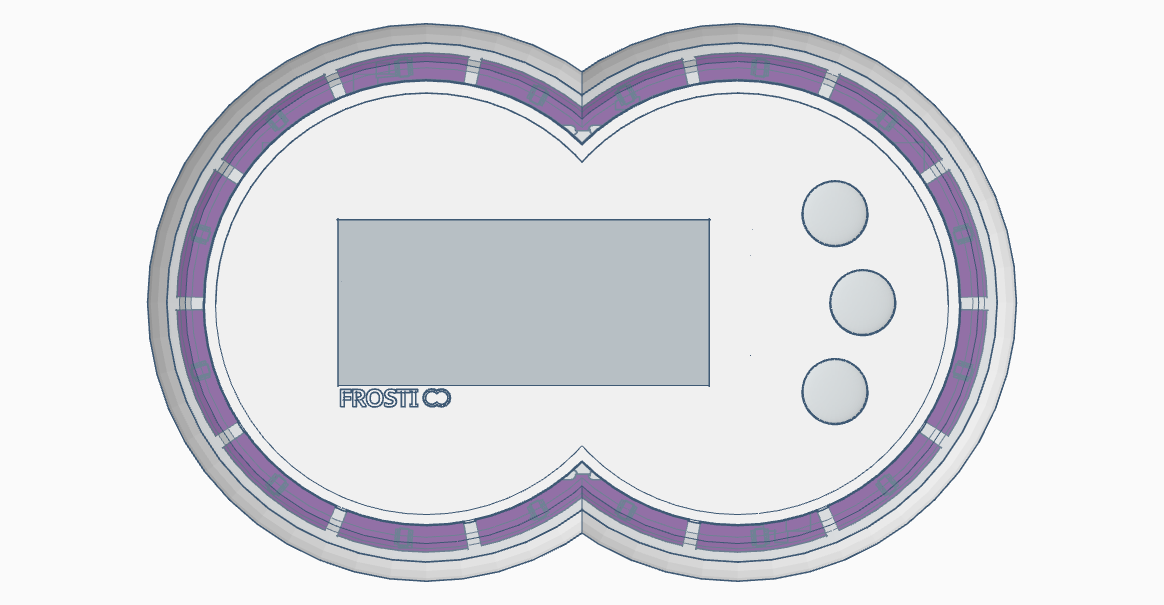
The main (gray) rectangle outlines the location of the e-paper display I’ll be using for general status, and the three gray circles are buttons. The purple ring is actually the PCB visible through what will eventually be a separately printed translucent cover that will scatter the light coming from the 16 LEDs (8 in each ring) used for status indication.
The actual PCB I put together (which is as close to OSHPark purple I could get!) is below
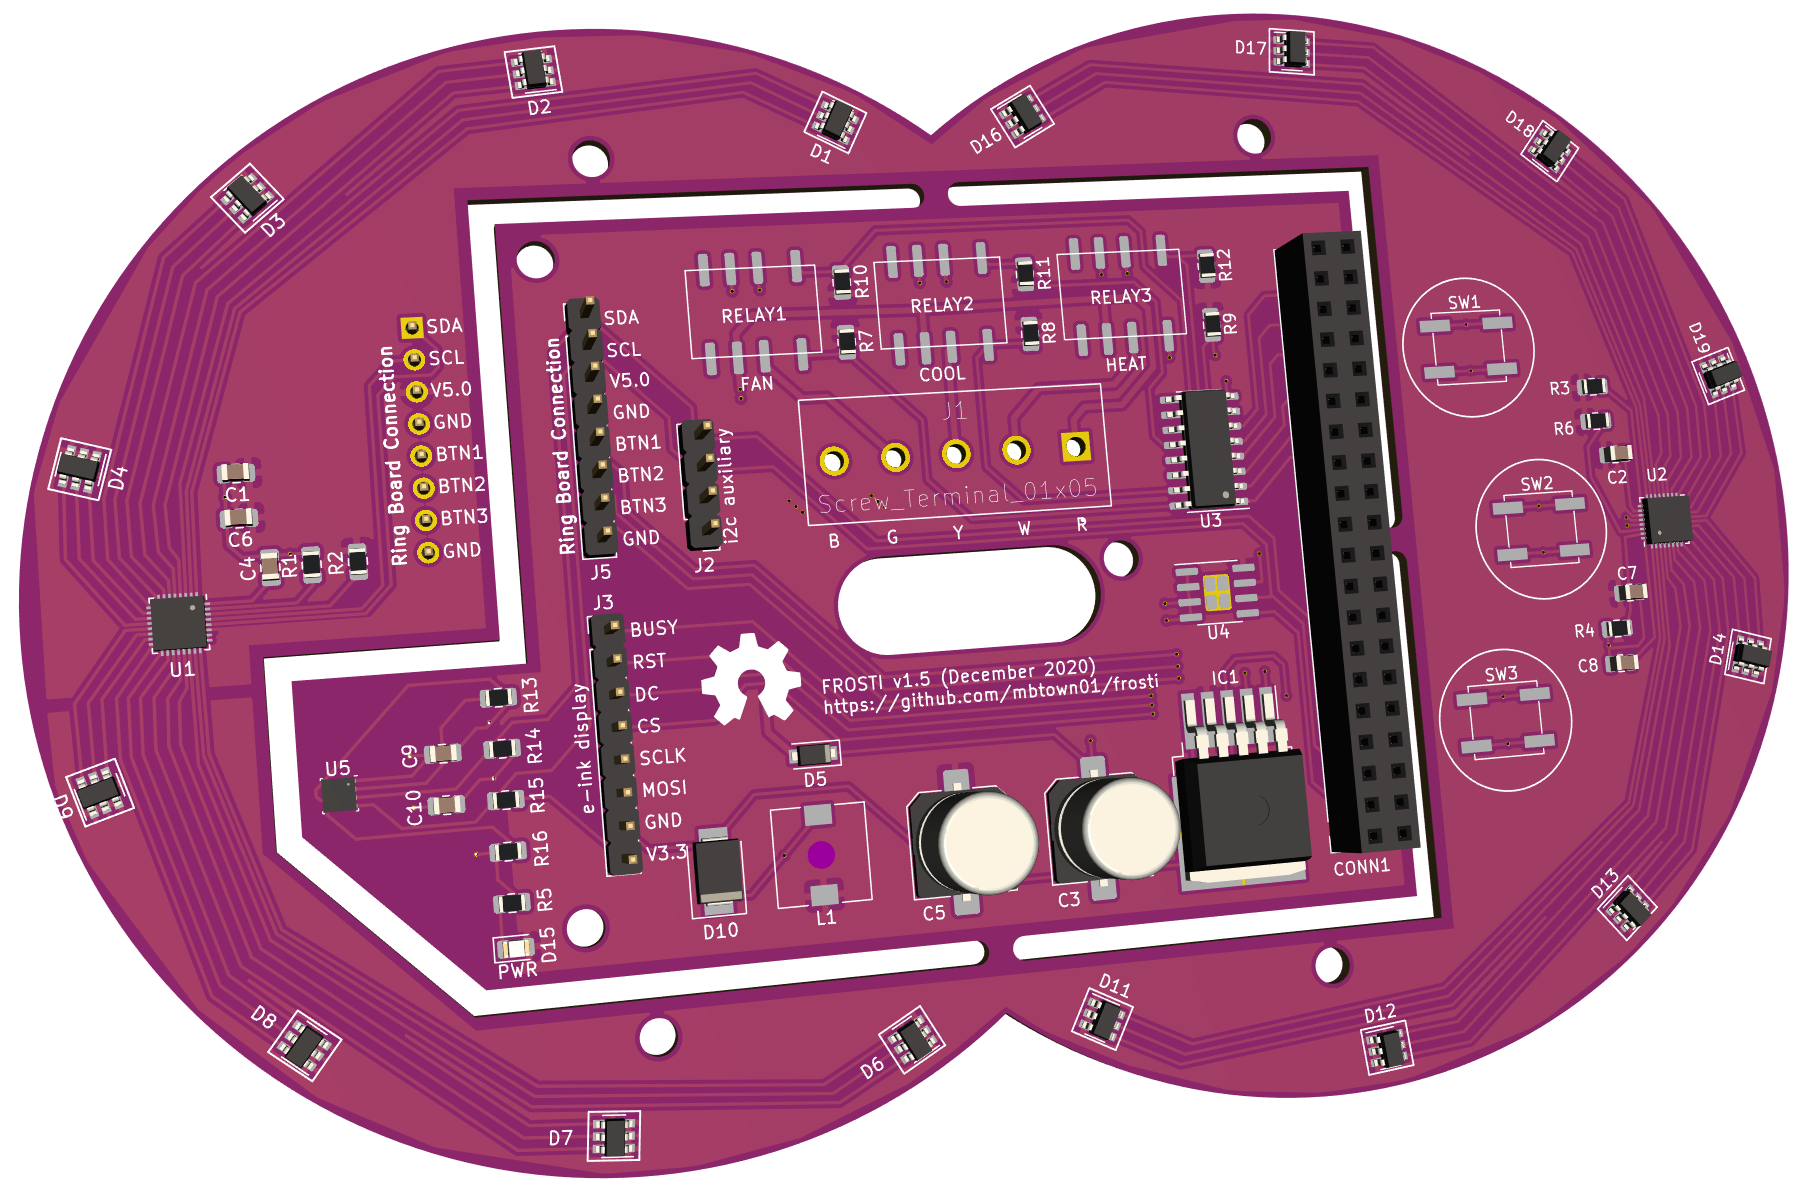
Included in hardware v5 will be:
- 24V AC to 5V DC transformer circuit
- Relays for A/C, heat and fan (simple 5-wire)
- Header for the e-paper display (Waveshare 2.9” with partial update)
- Two partial rings of 8 multi-color LEDs, each controlled w/ an LP5024 LED driver chip for high-frequency dimming and color mixing
- BME280 environment sensor, capturing temperature, pressure and humidity
- A CAT24C256 for i2c-based storage (a component I have some ideas for but honestly have no clue for sure what I’ll do with!)
Next steps
I have ordered a PRUSA “mini” 3d printer and it should be arriving in the next week or two. You can be sure I’ll have several updates on what I learn as part of doing some of my first 3d prints!